Showing posts with label thumbs down. Show all posts

Thursday, March 21, 2013

The big purple mistake


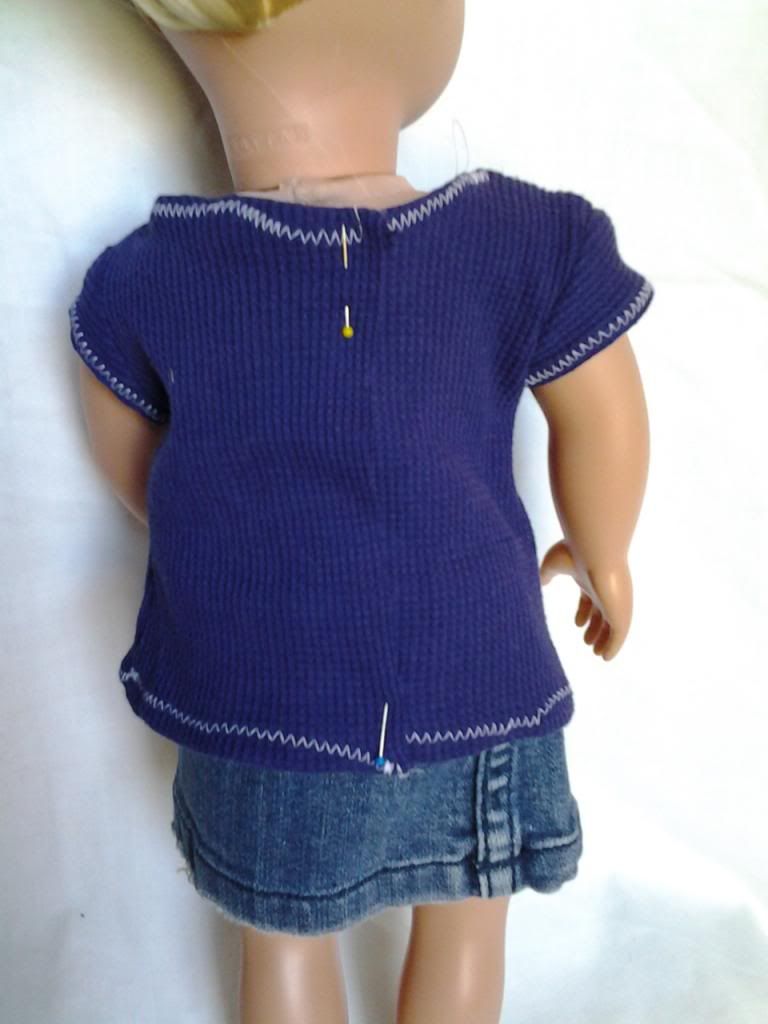
I was so pleased with how my Cinderella dress turned out and how well things had been going that I decided to try my hand at DUN DUN DUN… knits. Now my background with knits is that I really really really really really really really really really really really really really really really really really really really really really really really really can’t sew knits. No matter how hard I try, I just am not good at it. My stitches are always terrible and the material just goes all floopy on me. Its just too stretchy for me to work with.

But you know I’ve been so confident that I thought I would try J Silly me J I keep getting advice like: be patient, go slowly, and keep trying. But none of that helps with my knit issue L

I bought some Liberty Jane patterns recently (and got all their free ones of course) and from them chose a nice plain tee shirt. I’d like to add (plug for Liberty Jane) that their patterns are much much much much easier than even the easiest Simplicity pattern. I think printing the whole thing off in full color would defeat the purpose of the patterns being so cheap, so I only print the last couple pages – the pattern itself – and leave the instructions on my laptop to use. I just love how simple and concise the patterns are J

I chose a purple knit for the fabric. It was actually a t-shirt that I cut and used for fabric, a nice textured, bumpy tee. The pieces cut out okay. Sometimes when I cut out knit, the fabric stretches all funny and my pieces end up smaller than they are supposed to be or cockeyed or something, but this one cut ok.

Then I began to assemble. Now this pattern was sooooo easy, there wasn't really room for error. It had a front, 2 backs, and 2 sleeves. Super simple, right?

W-R-O-N-GGGGGG

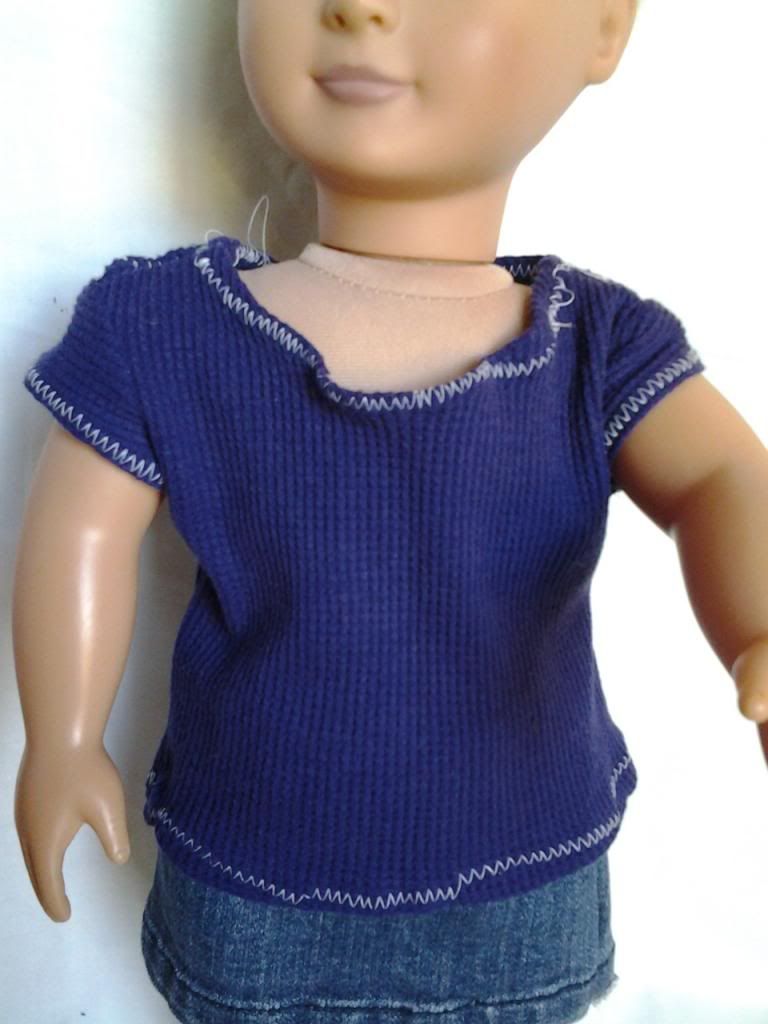
I like to use contrasting thread when I know I am going to really be practicing something so I can see my mistakes. Well this was one giant mistake… I can’t even say that I messed anything up because the shirt went to together exactly as it was supposed to. Its just the stitching looks TERRIBLE. I just can’t sew knit and I don’t know why L

I give it a BIG thumbs down:


Saturday, March 16, 2013

2 Dresses...plus bonus miniskirts


You know when you are on top of the world and feeling all confident and competent that the other shoe must drop, right? Well those tights were just the bee’s knees – I had so much fun making them and just knew that if I could zig zag stitch me some sock material, I could do anything: knits, stretchy, what have you…

Hmmm, a little lofty are we?

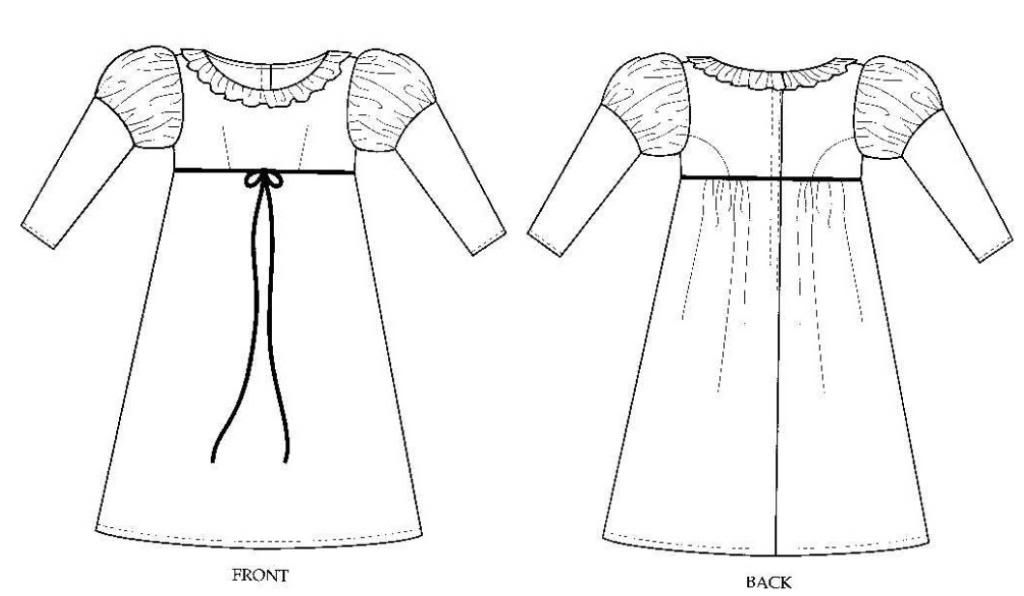
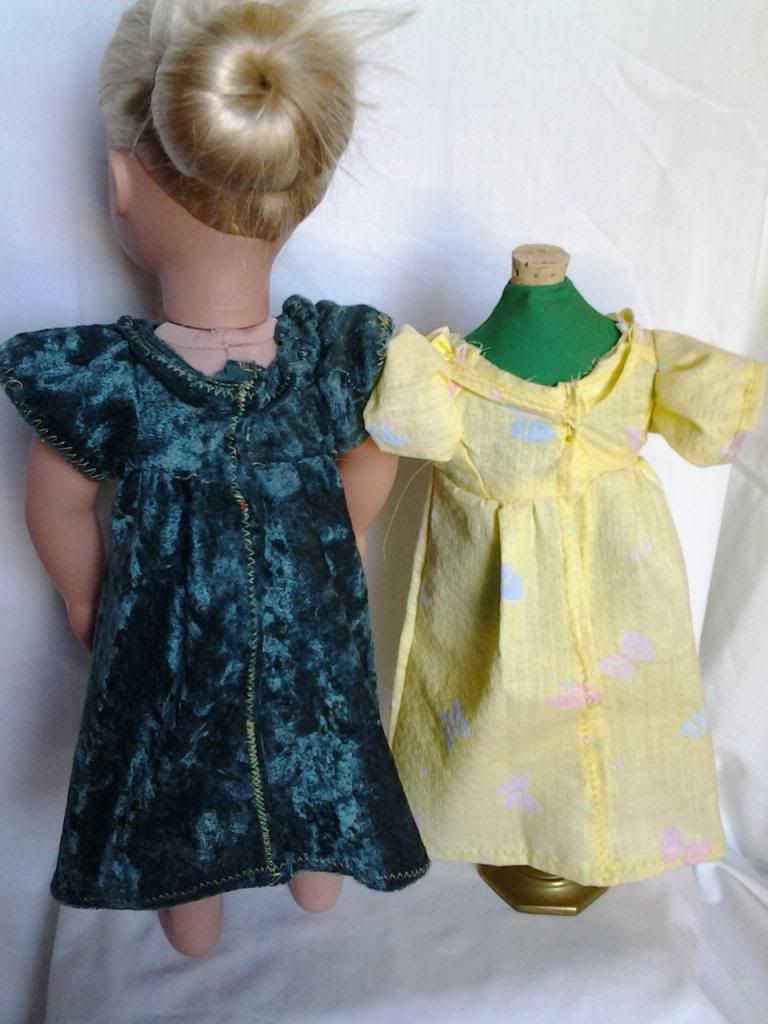
I selected another pattern from the American Girl collection, this time I went with Josefina’s Christmas dress.


I think Josefina’s clothes are on the simple side, I looked through all the choices and kept coming back to her wardrobe because it looked the easiest. The ironic part is, when I save up to buy my American Girl doll, it’s actually Josefina I will be buying, so it’s funny that I’m making her clothes…J

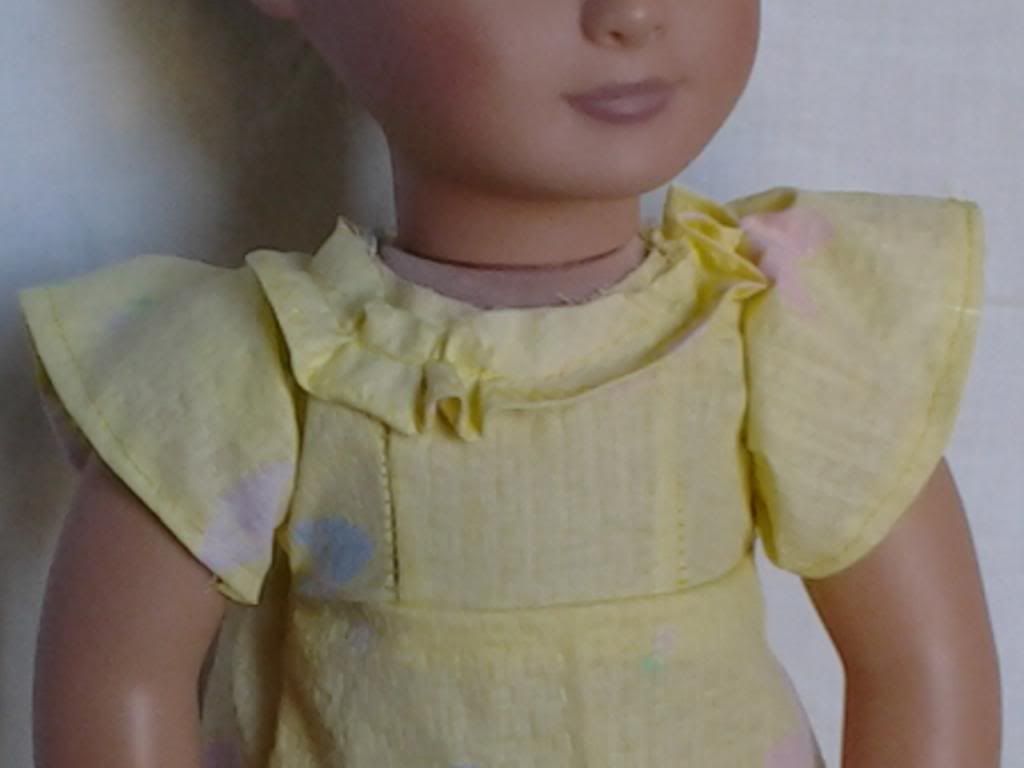
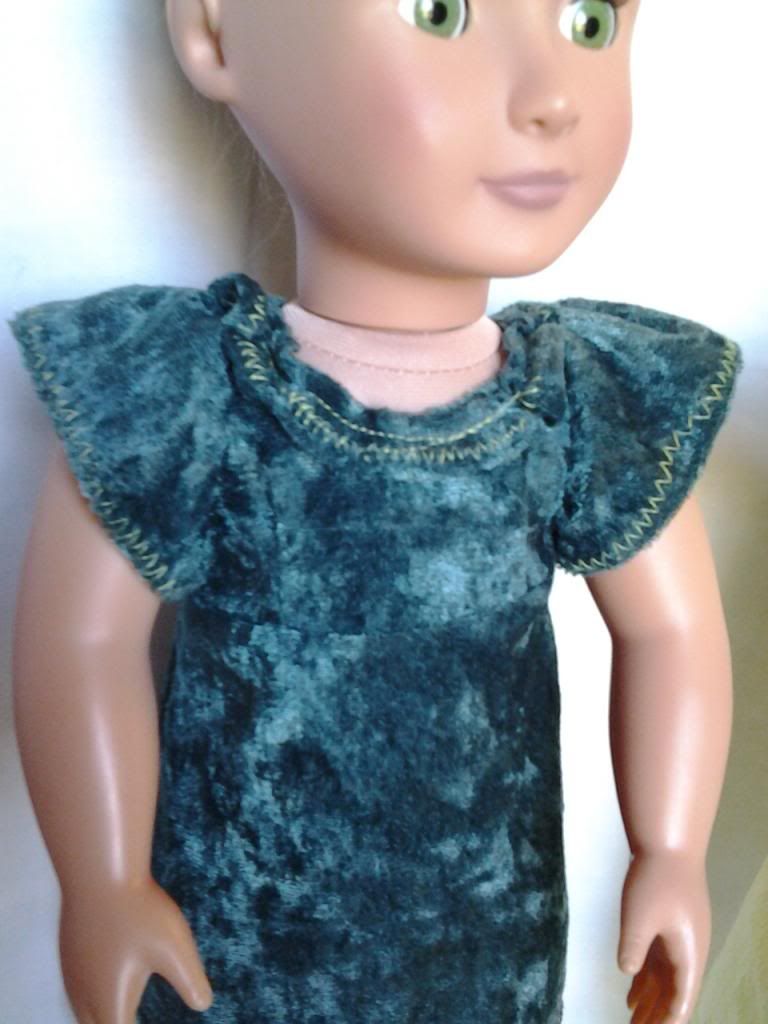
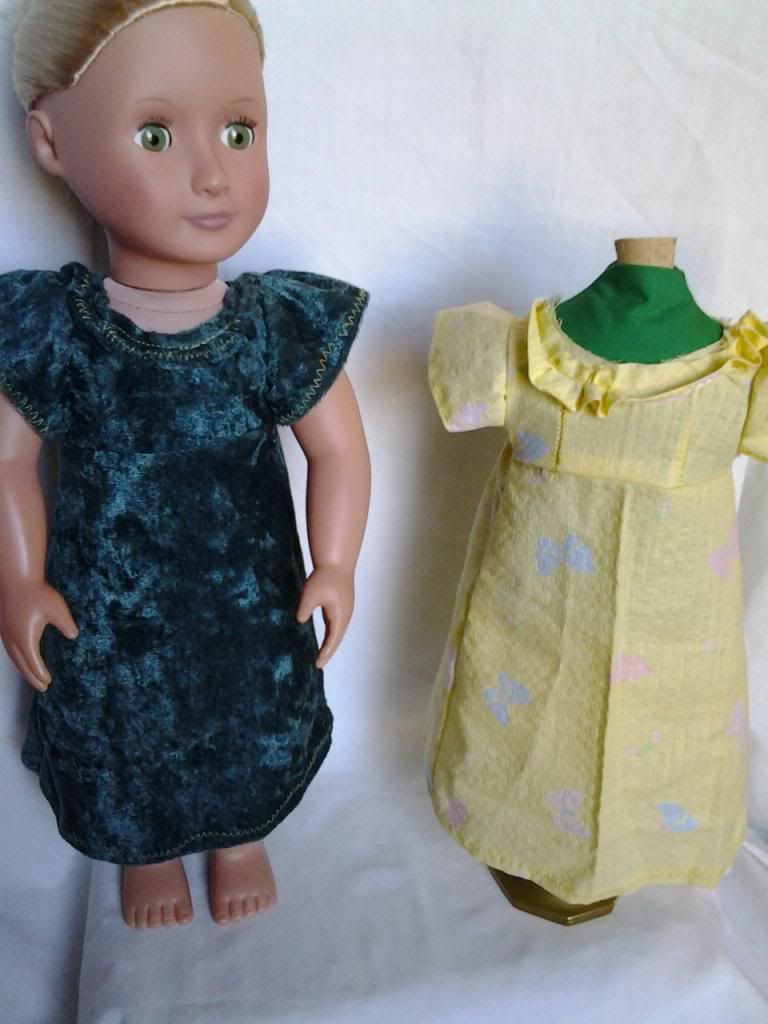
I decided instead of doing long sleeves, I just wanted to do the upper portion of the sleeves. It turned out to make the sleeve “flutter”, which I really wasn’t expecting (but tells you how little I know about how clothes are put together) It makes sense to me now because the bottom of the sleeve is not gathered but for some reason I was thinking that if left off the long part of the sleeve, I would be left with a poufy cap sleeve. You live, you learn, right?

For this dress, I actually couldn’t decide between 2 fabrics – 2 very different fabrics, I might add. SO I decided to heed my mom’s advice: she told me it is just as quick and easy to make two garments as it is one because you do each part twice but at the same time, so both garments are made in nearly the same amount of time.

The first fabric is a great spring yellow with little butterflies, thin and textured, not stretchy. I’m not so good with fabrics yet, so I don’t know what kind it is, but it kind of was like seersucker (maybe it is seersucker, I don’t know – Aunt C will have to help me out on that one J)

The second fabric is…I don’t even want to say it…crushed panne in a dark green. Now this stuff is just as glorious and scrumptious as it comes, but I CANNOT sew with it. You must remember, my confidence was all high from making those tights though… I am...SUPER SEAMSTRESS!! Bwa ha ha ha!!

I started putting together these simple, simple dresses…I even understood enough to do the sleeve the way I wanted it instead of doing the full long sleeve. The problem came when I attempted to do the neckline. Now I’ve discovered that I’m not so good with tiny ruffles. When it comes to hemming and gathering tiny strips of fabric, mine kind of coil up and go funny on me, so I decided after this fiasco to either make bigger ruffles or stop hemming them until I get some more experience under my belt. The neck ruffle on this dress SUCKED. I didn’t understand the part in the directions about attaching the neckline (I do now, but at the time, I thought I was doing it right) The instructions seemed to say to attach it so that the raw edge was left visible and quite prominent. Obviously that wasn’t right, but I read and re read and re read and thought I was following it exactly. What I ended up with was 2 ugly dresses with unfinished necklines L


Now my rule is not to “waste” Velcro on bad outfits, so if you see pins in the back, it means I was not satisfied with my craftsmanship and did not deem it worthy of using Velcro. These dresses, unfortunately, fell into that category.

I had accidentally kept my stitch length on the longest setting for these dresses, so the yellow one is kind of sloppy looking (to me after using that short stitch on the nightgown) plus you can see in the picture above that the stitching is actually starting to come apart on the chest :( and the panne was soooo slippery and stretchy, I used the zig zag – I went with yellow for the thread and you can really see my lousy stitching on that green dress…I was not real happy with how they turned out. The sleeves turned out cute, but overall, I give both of these dresses the thumbs down L


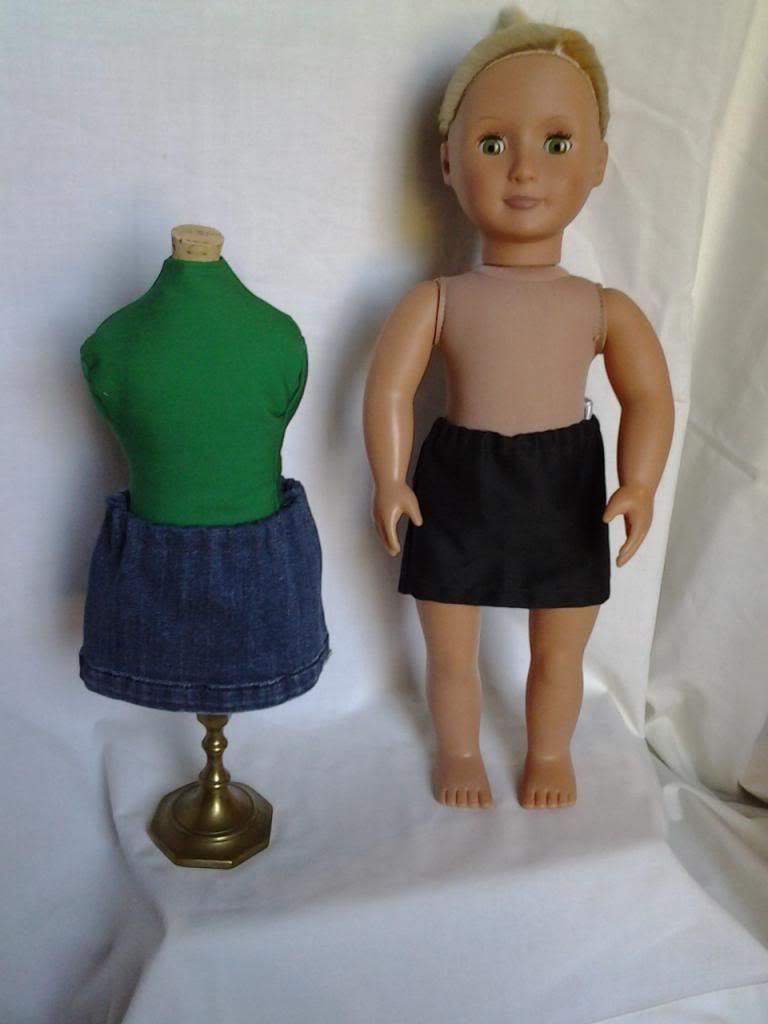
On a positive note, because I needed a way to showcase my positively adorable tights, I made two miniskirts. (I took all the pics of the tights after I made the skirts but made the skirts after all the tights were done – that’s why most of the tights pictures show them with the skirts)

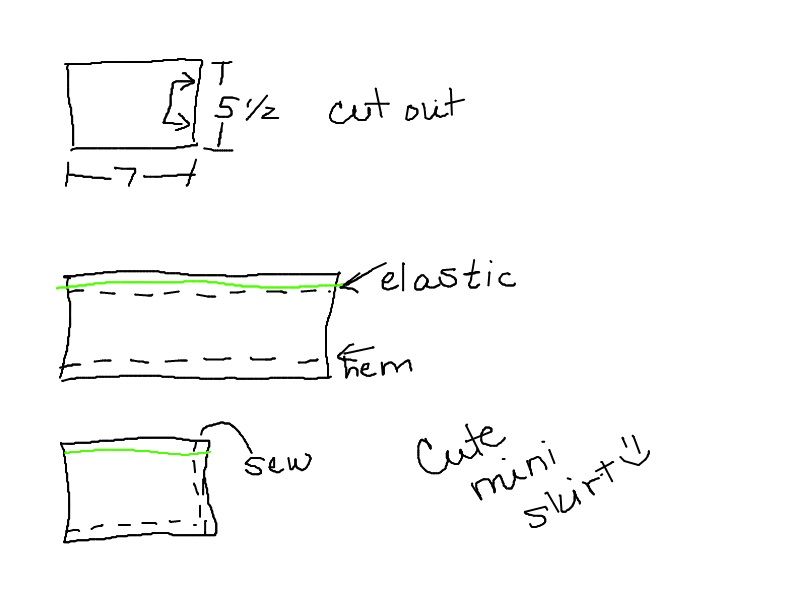
The skirts were sooo easy J I just cut out a rectangle of 7 inches by 5 ½ inches (I just eyeballed it to make them, but then measured afterwards) out of paper, put one of the short sides on the fold and cut out. Then I hemmed the bottom, “hemmed” the top (I don’t know what it’s called, but I put the pocket for the elastic in) then added the elastic, then stitched up the side seam. Super super easy. And the denim skirt I made out of a pant leg of pants that were too small for me. YAY!


Thursday, March 14, 2013

Too good to be true


Well, working with the fleece and the dress form really bolstered my confidence so I decided to move forward with my next project. In my searches for free doll clothes patterns on the internet, I have come across so many wonderful blogs devoted to dolls, doll collecting, doll clothes, and best of all (for me J) doll clothes making!

I’m not too good at this whole blogging thing yet, but as I get better and learn more, I will be adding those places to my blog.

One of the things I came across is a fantastic page that has all of the original American Girl doll clothes patterns the company released. For free. I am in 18 inch doll clothes making heaven!

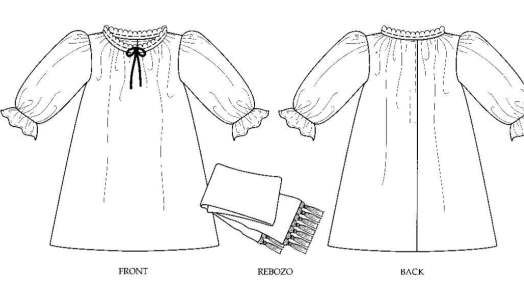
The first piece I decided to make is Josefina’s nightgown.
I didn't do the rebozo
 
It seemed fairly simple and straightforward. My mistake? Not reading the directions thoroughly… I know, I know, if I am a beginner, I really need to be paying extra close attention to the directions.

I have a stash of top sheets in my fabric collection – I chose a white and light blue striped sheet that I had been using as a cover for my fabric shelf. (I just threw the sheet over the messy shelf when company came over J)

I cut out the fabric, making a real effort to keep my stripes in the right spot – you’ll see what I mean when you see the pics! Then I started to construct the garment.

Now I must pause a moment to talk about confidence. I read that as your confidence in sewing increases, your stitch length should decrease. A larger stitch, like a basting stitch, is easier to take out. Beginners know that ‘easier to take out’ means ‘when I make a mistake’. And since I make LOTS of mistakes, my stitch length has always been set to the longest possible.

My machine, for whatever reason, doesn’t have a good ‘baste’ stitch – my longest stitch is actually much shorter than a baste stitch and it has been the only length I sew on  - I need all the help I can get when it comes to fixing my mistakes J

But if you remember my machine broke and I was using a loaner – that machine has a nice long baste stich. I was surprised to see how long; it made me realize that I shouldn’t be sewing on the longest stitch length always.

Also, the shorter stitch length makes a more professional-looking garment that is “held together” better, obviously.

So for this project, I decided to shorten my stitch length. I figured if I needed to use the seam ripper, I needed to use the seam ripper, right?

So I am starting to sew this nightgown together, and not only are my stitches perfect, but all of the seams are straight, the stripes line up, I mean this piece was getting ready to be my magnum opus here! Since I felt so satisfied and confident of this piece, I felt OK to change something: the instructions say to sew lace to the neck line but since I have never sewn with lace before, it was a bit intimidating to me, so I opted to just hem it instead. No biggie, right? Here I am thinking that NOT using the lace would make the project “simpler” – ha ha on me…

I completed the nightgown and was just so impressed with myself that I decided to add a bit of rick rack to the neck instead of lace, congratulating myself on doing such a neat and careful job. So I continued to follow the instructions to the end and then I got to the part where it says to “add a ribbon to the lace” (some of you more experienced seamstresses probably see what’s coming, right?) I had absolutely no idea what that meant, but since I wasn’t using lace, I figured that part didn’t apply to me…

Let me use this opportunity to say that when I chose this pattern, I didn’t pull up the website to see what the “store bought” version looked like. Had I done that, this project would not have gone as awry as it did L here is the nightgown that American Girl sells.
Anybody figure out what I did wrong?
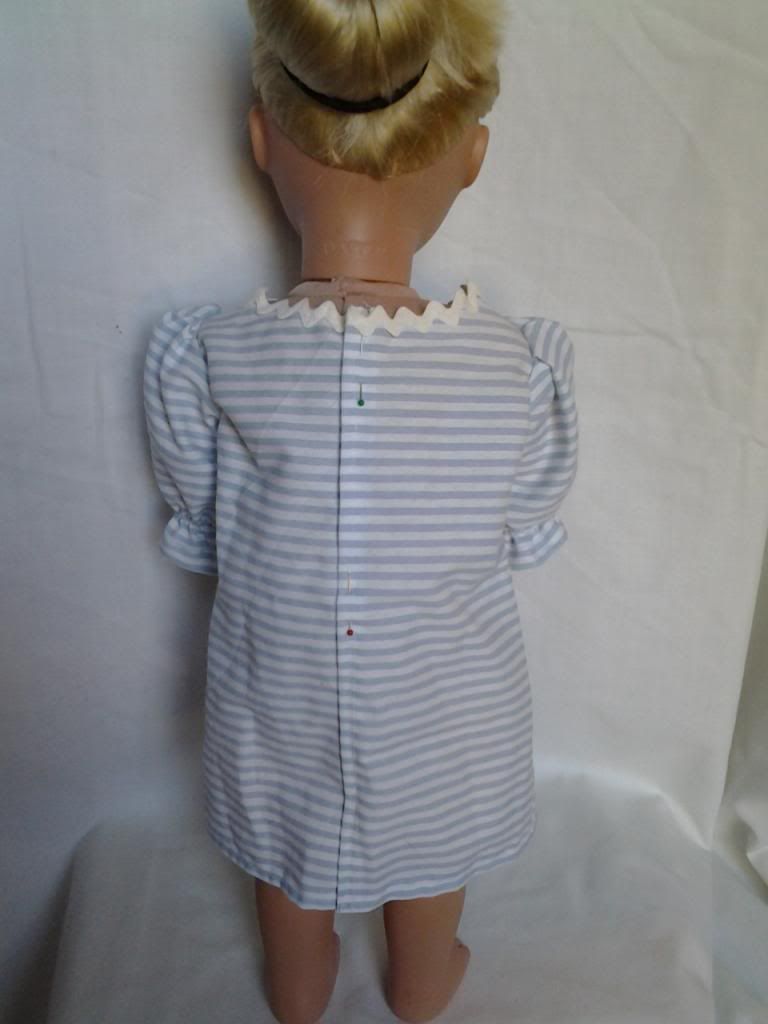
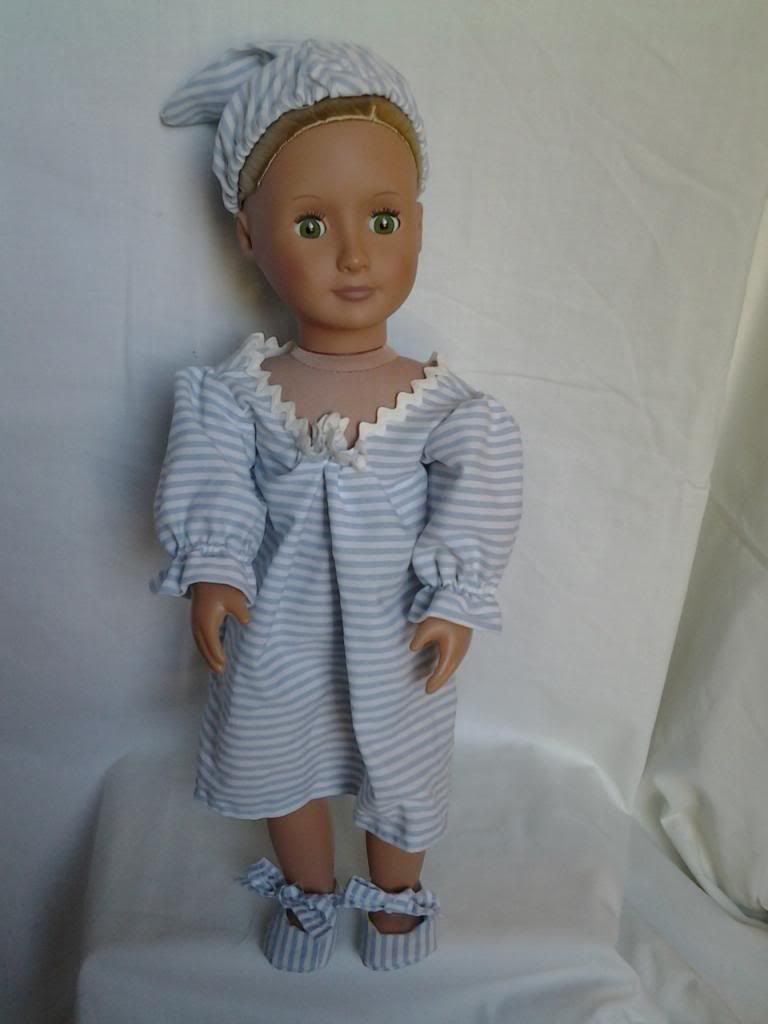
I sewed in the rick rack, still congratulating myself on a job well done. Check out the stripes in the back: do they not line up perfectly?


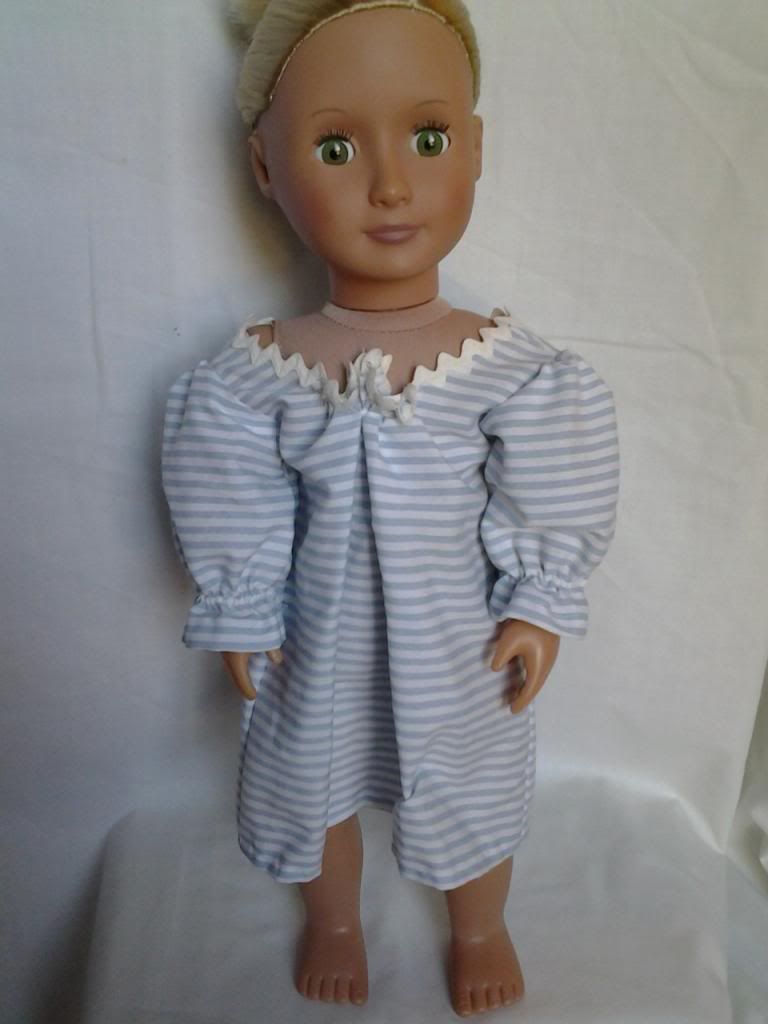
Well I finished and gazed upon this lovely garment I made, not really noticing how big the front seemed to be in relation to the back… I put it on the doll and was shocked!! You could have fit 2 dolls in this nightgown!! It looked terrible!! Unfortunately, I did not take any pictures of this catastrophe – I wish I had. I was crushed! The back was perfect, the front was perfect, the sleeves looked great, where did I go wrong??

Well, apparently, the part I didn’t understand about adding the ribbon was that the ribbon was meant to weave in and out of the lace, creating a drawstring for the neck…
So here I am with this massive front (gorgeously sewn…) perfectly fit back (gorgeously sewn) and me not wanting to even fix it because I’ve never sewn anything so neat and tidy before. L
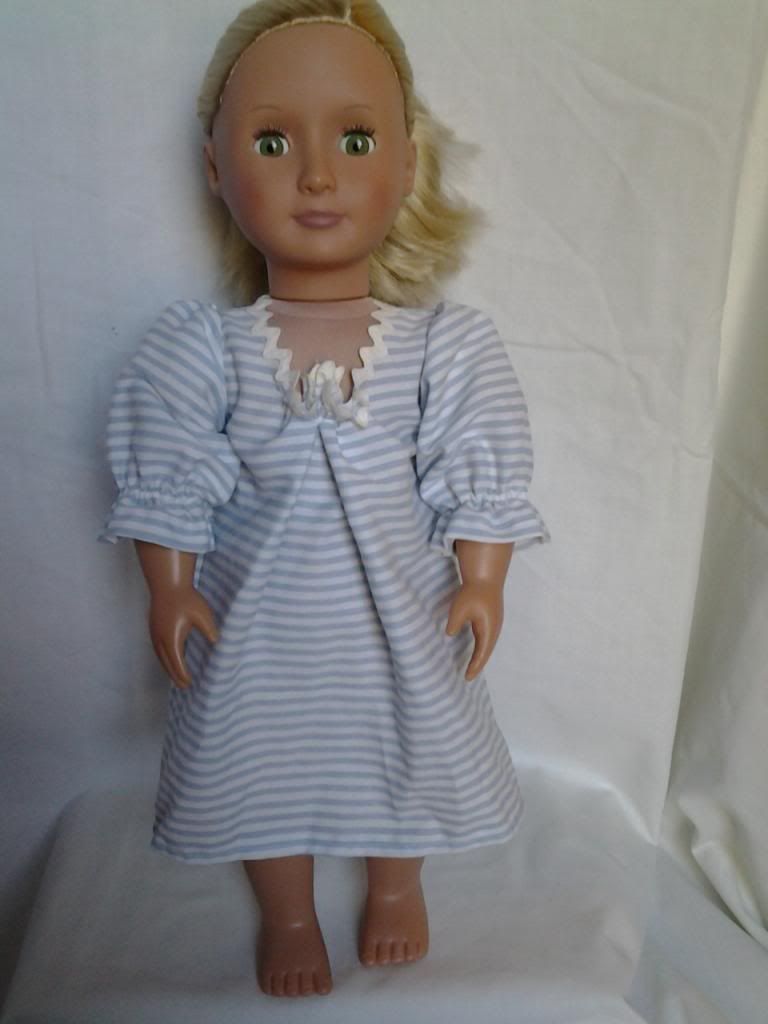
Now, I have learned a bit since this sewing disaster, so I know now I have some options to fix something like this, but at the time, I was flabbergasted. I chose to add a small piece of elastic to “suck in” the neck line. It only brought the neck line in marginally. So I added a second piece of elastic, thinking it might help. It didn’t.
 So I had a good cry at my beautiful garment that turned out ugly and told myself that if I could sew so nicely on this one, I can sew just as nicely on the next one! Back on the horse, right??


PART 2

In the meantime, one of the projects I was interested in was making some shoes. This is kind of funny to me because I refuse to buy this doll any store bought stuff since I am making the doll stuff to practice sewing, not clothing a doll for fashion purposes, you know? The thing is, I’m still a woman, and the thought of not having a good pair of all-purpose shoes to wear with the outfits I’m making just bothers me for some reason. When I make an outfit, I’d like to see it showcased well…

So I decided a good, plain pair of black mary jane style buckle shoes would be a good shoe to go with many of the outfits I plan to make and I’d been debating whether or not I want to buy a pair just to be able to put shoes with the outfits, or if I am really adamant about not buying stuff for this doll. Not wanting to buy shoes when the purpose of even owning the doll is to practice sewing, I opted to make a practice shoe, similar to the type I wanted.
While pattern shopping, I had picked up McCall's 3469
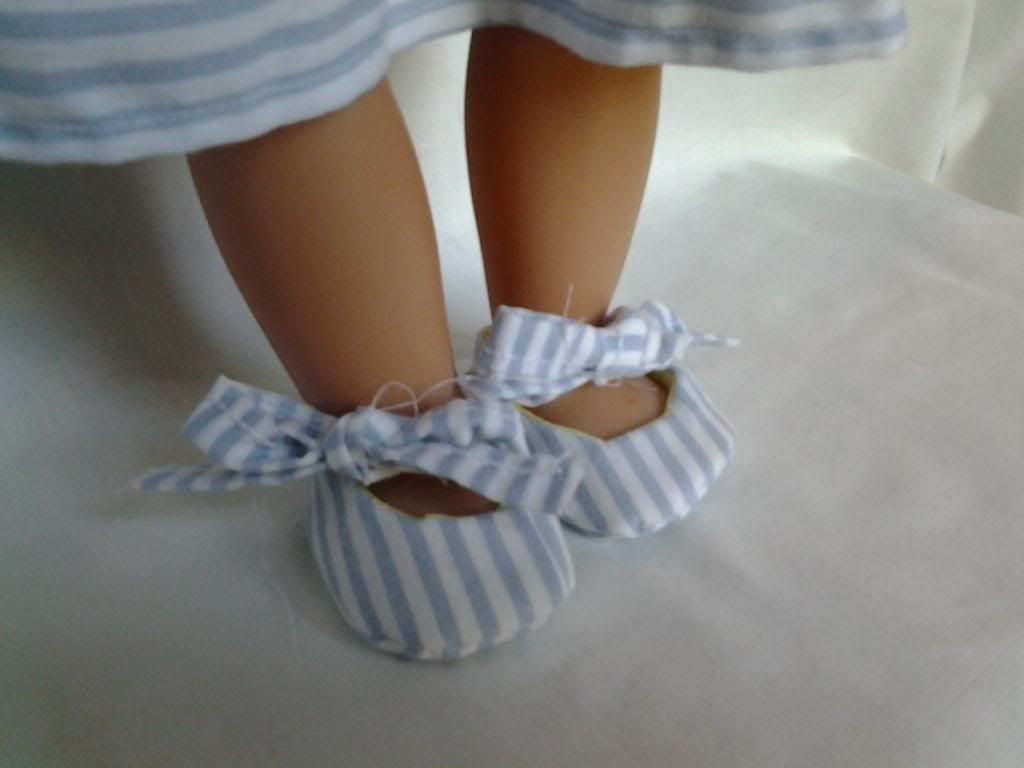
I chose the shoe in the lower left corner – the pink ones. I thought they looked simple enough and in black, would sort of look like a buckle shoe – with ribbon instead. I didn’t want to waste the black satiny fabric I had in case I botched them badly, so I decided to practice with “practice” fabric – my striped sheet.
The shoes were relatively simple, pretty straightforward, and gave me an insight into the basic concept of a how a shoe is put together. I used the fabric cut into strips and folded in half instead of ribbon and they came out really nice.


When I realized I had a nightgown and little “slippers” out of the same fabric, I went ahead and cut out 2 triangles, sewed them together, and hemmed the edge with elastic to create a sleeping cap. I didn’t measure or anything, so the cap turned out kind of dumb-looking, but altogether, the pieces look pretty cute together.


I give the nightgown a sideways thumb, the cap a thumbs down, and the little shoes a thumbs up!

Whattya think? J
Monday, March 11, 2013

The ugly purple dress

Hi everyone!

Okay next up, I decided I was ready to plunge into my new hobby of making doll clothes and had researched the subject enough to realize that there are people on Etsy and eBay making doll clothes and selling them! I thought, you know, not only am I using the making of the doll clothes to practice sewing so I can sew people clothes, but if I got any good, I could sell my doll clothes. So my eventual goal is to get good enough to sell my stuff.

I don't anticipate that being any time soon...

So here we are at the next attempt. Joann's had a super-dee-duper pattern sale. For those of you who don't know me, I absolutely cannot pass up a Joann's 99 cent pattern sale. I stalk their ads, hound my aunt and show up at opening the morning of the 99 cent sales. I love me some 99 cent patterns :)

Here's what I picked: McCall's M3900 [top middle pic]

So I got a cute dress and thought the concept might be simple enough: bodice front, bodice back, skirt front, skirt back, puff sleeves – simple right?


Except you forget that I am the Shaky Seamstress and while my bravado is extremely high, my skill is still quite low and my attempts quite shaky.


I started this project by picking the fabric. Check the About Me for my behind the scenes in my fabric stash :) Thank you to my sewing matriarchs.


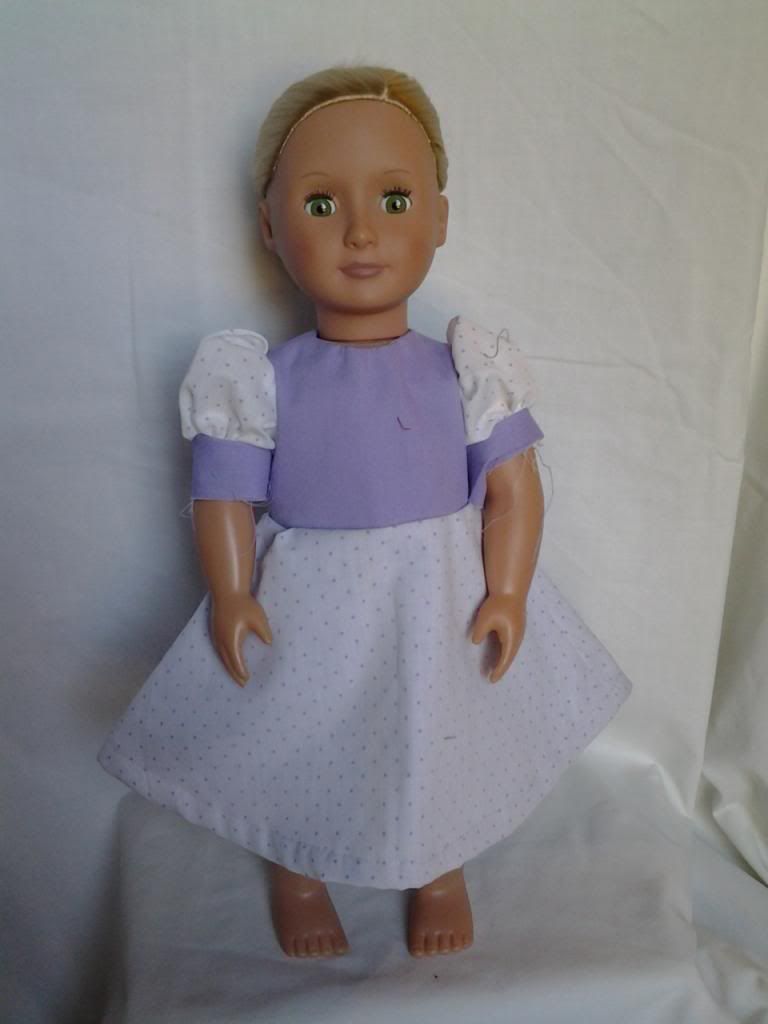
I decided I wanted to use 2 of my coordinating fabrics – so I picked a heavier purple for the dress and bodice and a lighter white with purple dots for the sleeves. I even got cocky with this one and decided I wanted the skirt piece to be the purple with the white over it for a nice “2 skirt effect”...


I've got hiiiiigh hopes
I've got high apple pie in the skyyyyyyy hopes

Sigh...


So I laid out the fabric, put the pattern pieces down – remembered what I was cutting out of what – and cut out my pieces. Boy was I on top of the world!

I started sewing the pieces together, I followed the instructions e.x.a.c.t.l.y. (or so I thought) I did the bodice okay – no problems there. I even did a pretty good job on the sleeves. I think I’m pretty good at gathering...more detail on that technique later. I even remembered to put both pieces of skirt together and follow the instructions for both...however, this is where I began to lose it.

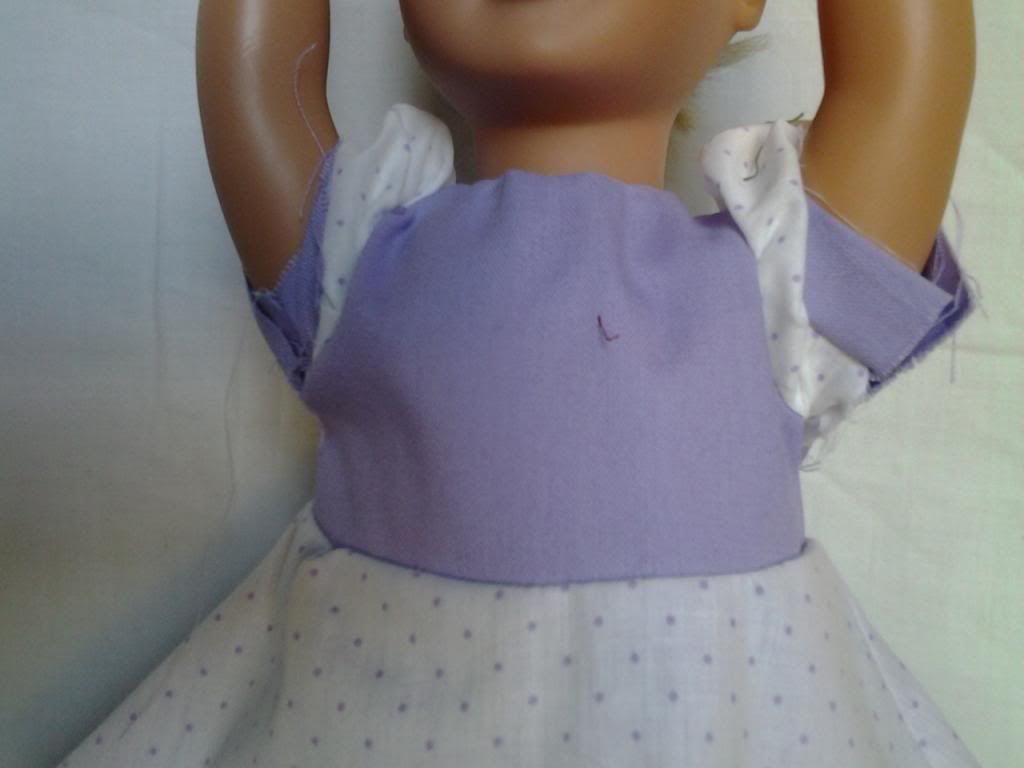
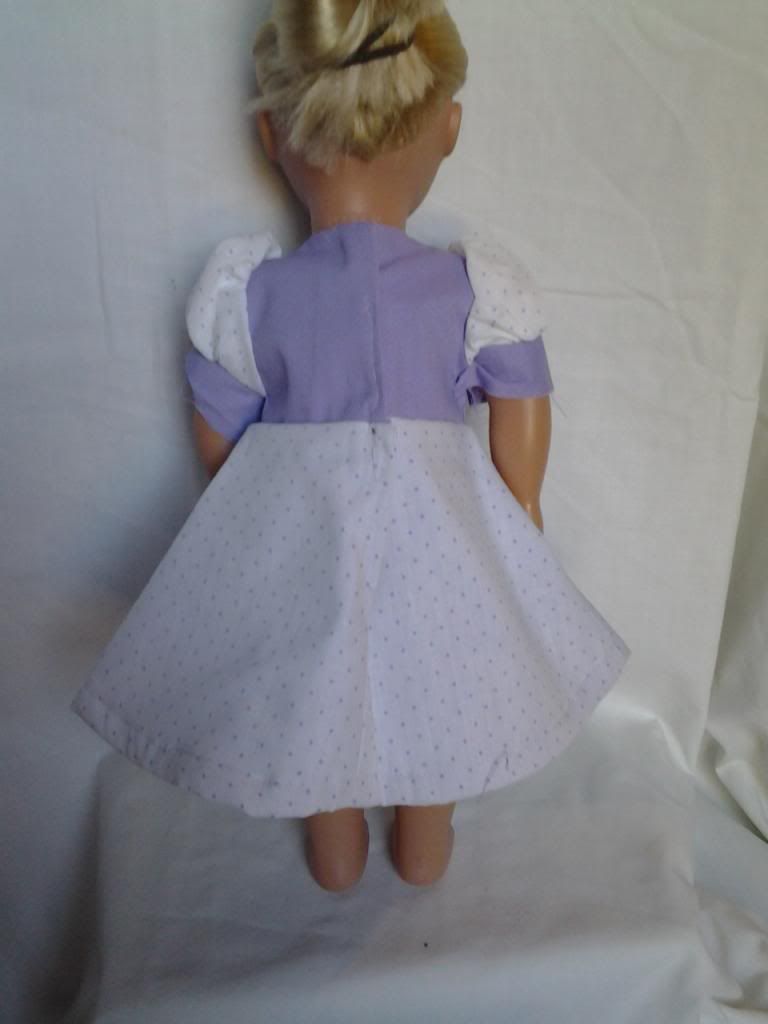
The first thing I did wrong was sew the hems of the skirts together. I don't know why I did that , I think I was not paying attention. I intended for the skirt to be 2 separate pieces but because I sewed their hems together, what I ended up with was a purple skirt piece sewed behind a white with purple dots skirt piece. It looks like one is the front and one is the back...not really what I intended. Well thats ok...I guess...its just a practice piece, right?

Then I don't know what happened!

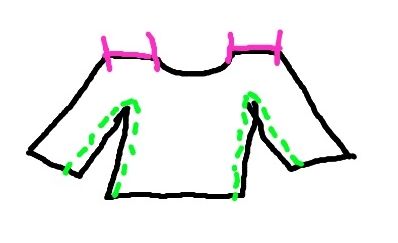
I know now how doll tops are made – sewn flat. I have been interested in learning about this from Sewing with Nancy – apparently she discusses this in some detail. I just haven't yet. The idea is that you lay the sewn front and back pieces (having been sewn together at the shoulders or something) and sew the sleeve seam and the side seam as one. Its much flatter and convenient when working with doll clothes.
 
Like this:


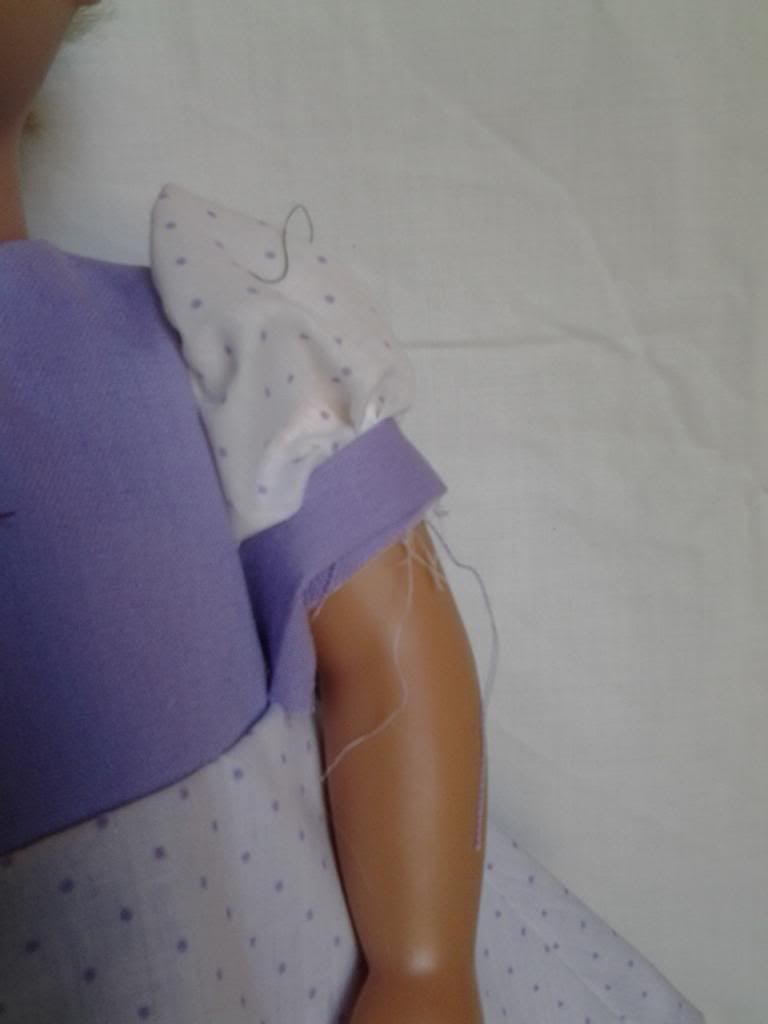
I had no idea of this technique when I made this dress and really thought I followed the instructions exactly. However, you can see from the picture that I did not sew the sleeves in this fashion and then I couldn't figure out why there weren't instructions for the sleeves! I'm a mess here!


 Aside from the skirt piece being connected when I didn't want it to be and the sleeves not being sewn...at all, I also didn't like how “big” the dress seems on the doll. I was really making tiny seams at this point and the dress just seems overall too big for her.

Okay, check it out – let me know what you think.


A good try, but I give it a huge thumbs down. The robe turned out way better...